

MediaWiki makes it super obvious with what you are doing. When you are editing a page, it tells you exactly that. You’ll see something similar when creating pages as well, but we’ll get to that in a bit. First, we need to edit in where we’re putting our new page. Currently, the page for Help Wiki Highlights Series only has the first article, How to Create a Great Guide or Tutorial. We need to do the same for the editing pages article. Log into your Curse account and click on the Edit tab to see the above window.
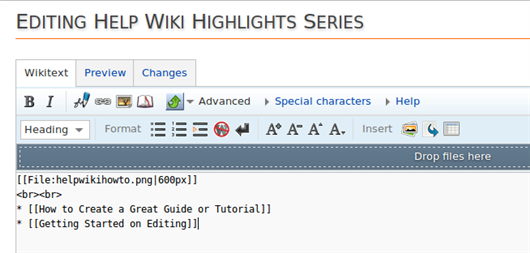
In wiki syntax, the asterisk (*) followed by a space at the beginning of a line creates a bullet point for lists. Words placed between open and closed double brackets ([[ ]]) create an internal link. Internal linking is what you use when linking within the wiki. For example, you can link to the guide article from the editing article by copying and pasting the title above. This is how you create your page’s title, so give what you put between linking brackets some consideration!

Now we have the title of the article as the page name, which appears as in red. Any time you see a red link on your favorite wiki, consider it an opportunity to add new information for the community! Once a red link is up, all that you need to do to continue making your new page is to simply click on the red link. Doing so will automatically bring you to a new page with an empty edit box. MediaWiki will also let you know that you’re now creating a new page.

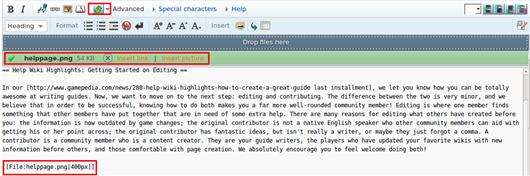
There are a few things in this image that are important. Highlighted, you’ll see an uploaded image and it inserted into the page. Uploading an image from your computer is really simple! As with most editors, there is a way to upload files. Here, you’ll want to click on the green, upswinging arrow, highlighted at the top. The last part in brackets, highlighted in red, is the actual image inserted into your wiki page. This information includes that it is an uploaded file, its name and extension (helppage.png) and the size of the image. The default is to 400px, but you’ll notice that images for the Help Wiki Highlights series have been changed to 600px. You’ll also notice the header syntax (two sets of == with the headline between them) and linking syntax, which will be expanded upon further down.
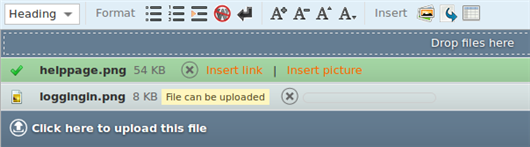
When you go to upload an image, first the system will make sure it can be uploaded. After it has been checked, all that is left is uploading and inserting the file! The file management system is really easy to use. You can either drag and drop or browse files to find what you’re looking for.
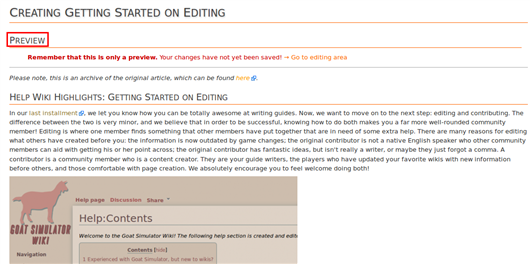
This is the preview screen, which you are encouraged to use as often as possible. Previewing not only lets you see anything you might have forgotten, need to adjust or mistakes that can be corrected before saving, but it also keeps the edit history log nice and tidy, because you have the chance to make sure everything is perfect before you save. If you’ve found several changes that need to be made before you finalize your page, you can continue previewing after changes until your page looks ready to go.

This image is really about two separate things. Earlier, we mentioned that there is specific wiki syntax for linking, which is above. While internal linking uses just the name of a page between double brackets to link elsewhere on the wiki, or for images, noting file:name.extension between double brackets, linking offsite is a bit different. Keep in mind that if you are linking across wikis, you will need to use external linking as well. Internal linking works only within the realm of one wiki. For external linking, the syntax is a single open bracket, the URL you are linking to, a single space, the word you want to link, and a single closed bracket. You’ll see this underlined in red above, where we’re linking to the Help Wiki, using the following: [help.gamepedia.com Help Wiki].
The second thing about the above image is really the last part to go through before you finish creating your new page. At the end, you’ll want to make a summary for what you are doing, whether editing or creating a new page. If you’re making a new page, put that in the summary. If you’ve edited a page, leave a brief description as to what you’ve done. Since others are also editing the same wikis you are, having short, concise descriptions of all actions done within each wiki will help keep everyone on the same page.
There you go! That’s all there is to creating new pages for your favorite wiki! We know you are all excited to take those fantastic guides you’ve written and get them posted to all of your favorite wikis, and we look forward to reading them. Are there any tutorials you feel are missing from the Help Wiki? What would you like to see for the next Help Wiki Highlights? Let us know!